Sep 10, 2026
How to Read a Handheld Laser Weld Bead: What the Weld Appearance Tells You
A weld bead can reveal welding problems. Check the weld first, adjust one parameter at a time, and test again.
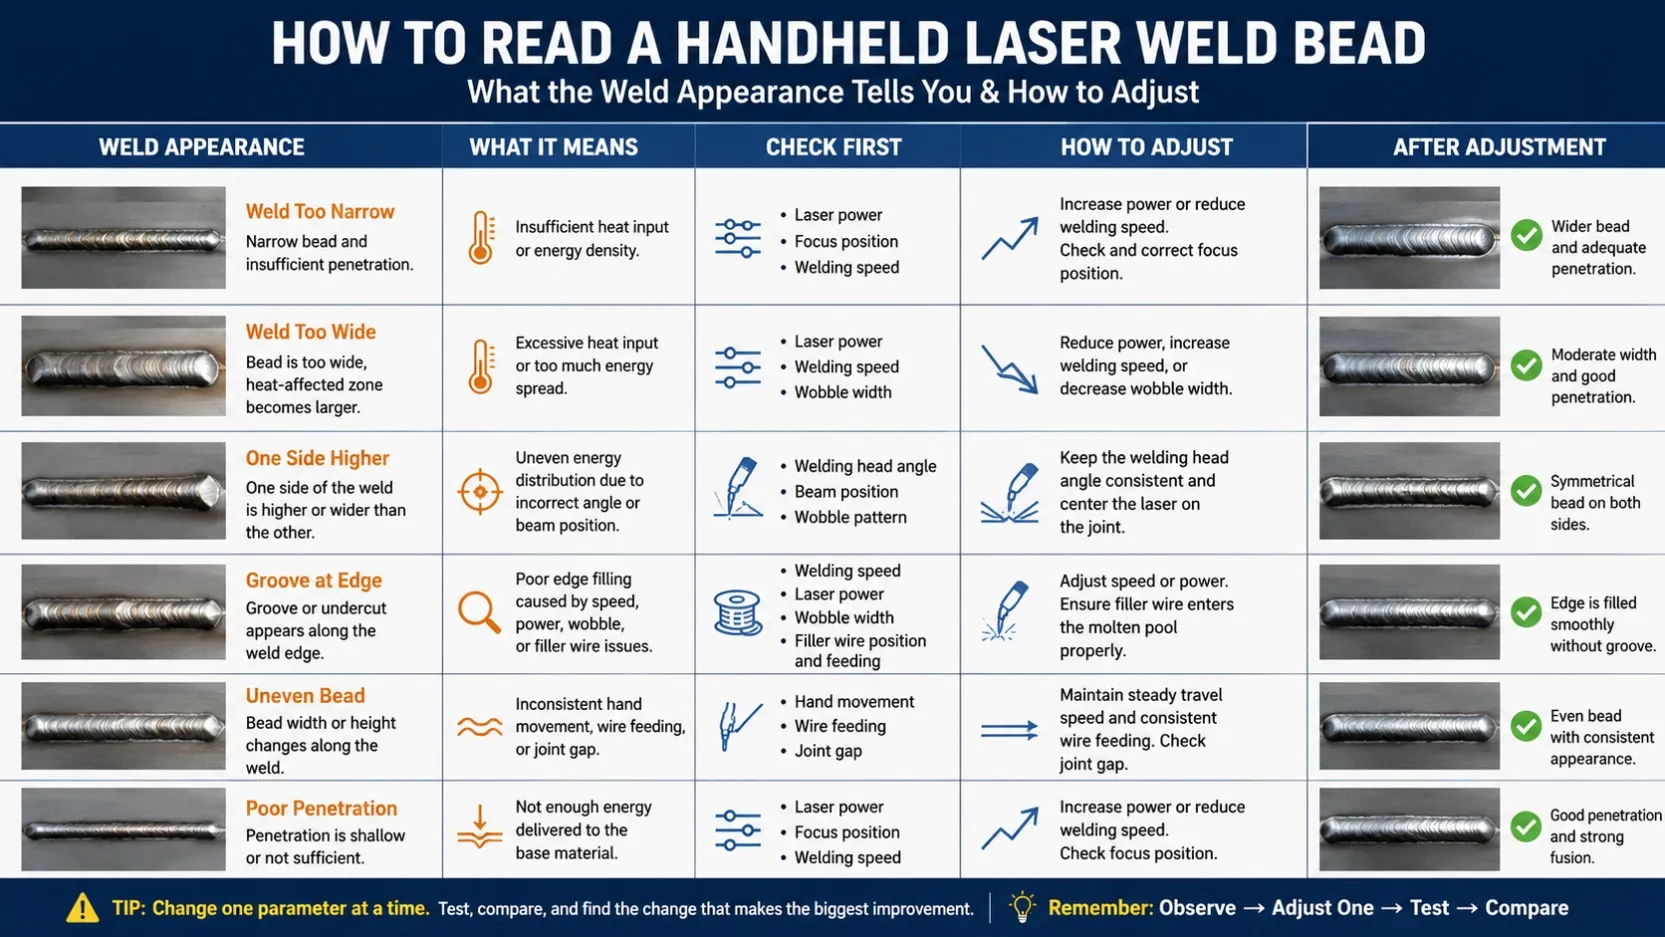
A weld bead is not just the final result—it can also tell you whether your welding parameters are properly matched. Instead of changing several settings at once, start by looking at the weld appearance.
1. Weld Bead Is Too Narrow
If the weld is narrow and penetration is insufficient, check laser power, focus position, and welding speed.
- Low power may not provide enough energy to create a wider molten pool.
- Excessive welding speed reduces the heat delivered to the material.
- An incorrect focus position can reduce energy density at the workpiece.
What to do:
First reduce the welding speed slightly or increase the power step by step. If the weld remains unstable, check the focus position.
2. Weld Bead Is Too Wide
A wide weld does not always mean better penetration.
If the bead becomes wider but penetration changes very little, check the wobble width and welding speed first.
- Excessive wobble width spreads the laser energy over a larger area.
- Low welding speed increases heat input and can make the bead wider.
- Excessive power can also enlarge the molten pool.
What to do:
Reduce the wobble width or slightly increase the welding speed and compare the bead again.
3. One Side of the Weld Is Higher
If one side of the weld is noticeably higher than the other, the problem may not be the laser power.
Check the angle of the Handheld Welding Head and the position of the laser beam relative to the joint.
An uneven head angle can distribute energy unevenly on both sides of the joint. This is especially noticeable on corner, lap, and fillet joints.
What to do:
Keep the Handheld Welding Head angle consistent and make sure the laser is centered on the intended welding position.
4. A Groove Appears Along the Weld Edge
A groove or undercut along the edge usually means the material near the weld boundary is not being filled properly.
Check:
- Welding speed
- Laser power
- Wobble width
- Filler wire position and feeding
If filler wire is being used, incorrect wire feeding can make the edge difficult to fill even when the main laser parameters are reasonable.
What to do:
Check whether the wire is entering the molten pool consistently before making large changes to laser power.
5. Weld Bead Is Uneven
If the weld bead changes noticeably in width or height along the same joint, first check whether the hand movement and wire feeding are consistent.
For wire-fed welding, unstable feeding can create alternating high and low sections. A large or changing joint gap can also make the weld appearance inconsistent.
What to do:
Keep a steady travel speed, maintain a consistent Handheld Welding Head position, and check the wire feeding path.
Don't Change Everything at Once
When troubleshooting a weld, make one adjustment at a time.
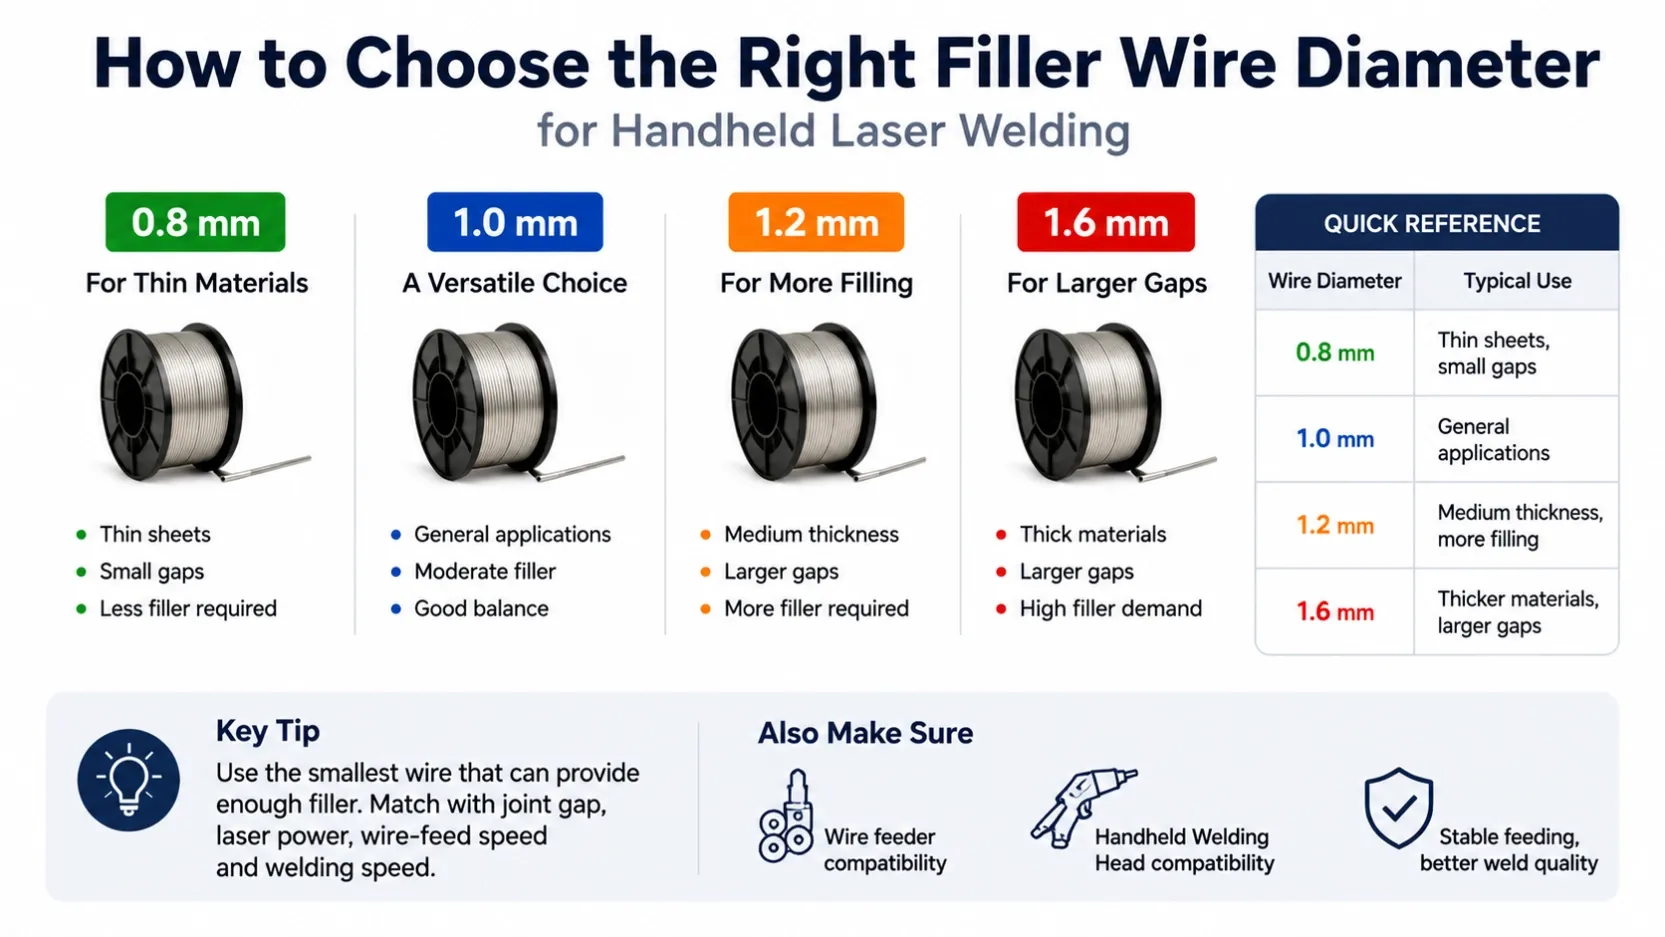
For example, if the bead is too wide but penetration is already sufficient, don't immediately increase power or change the wire diameter. Check the wobble width and welding speed first.
Observe → Identify the symptom → Change one parameter → Test again.
This approach makes it much easier to understand which parameter is actually affecting the weld.
Final Takeaway
Your weld bead is a diagnostic tool.
Learning to read its width, penetration, edge shape, symmetry, and surface consistency can help you find parameter problems faster and reduce unnecessary trial and error.