Sep 9, 2026
How to Check a Handheld Laser Welding Machine Before Starting Work?
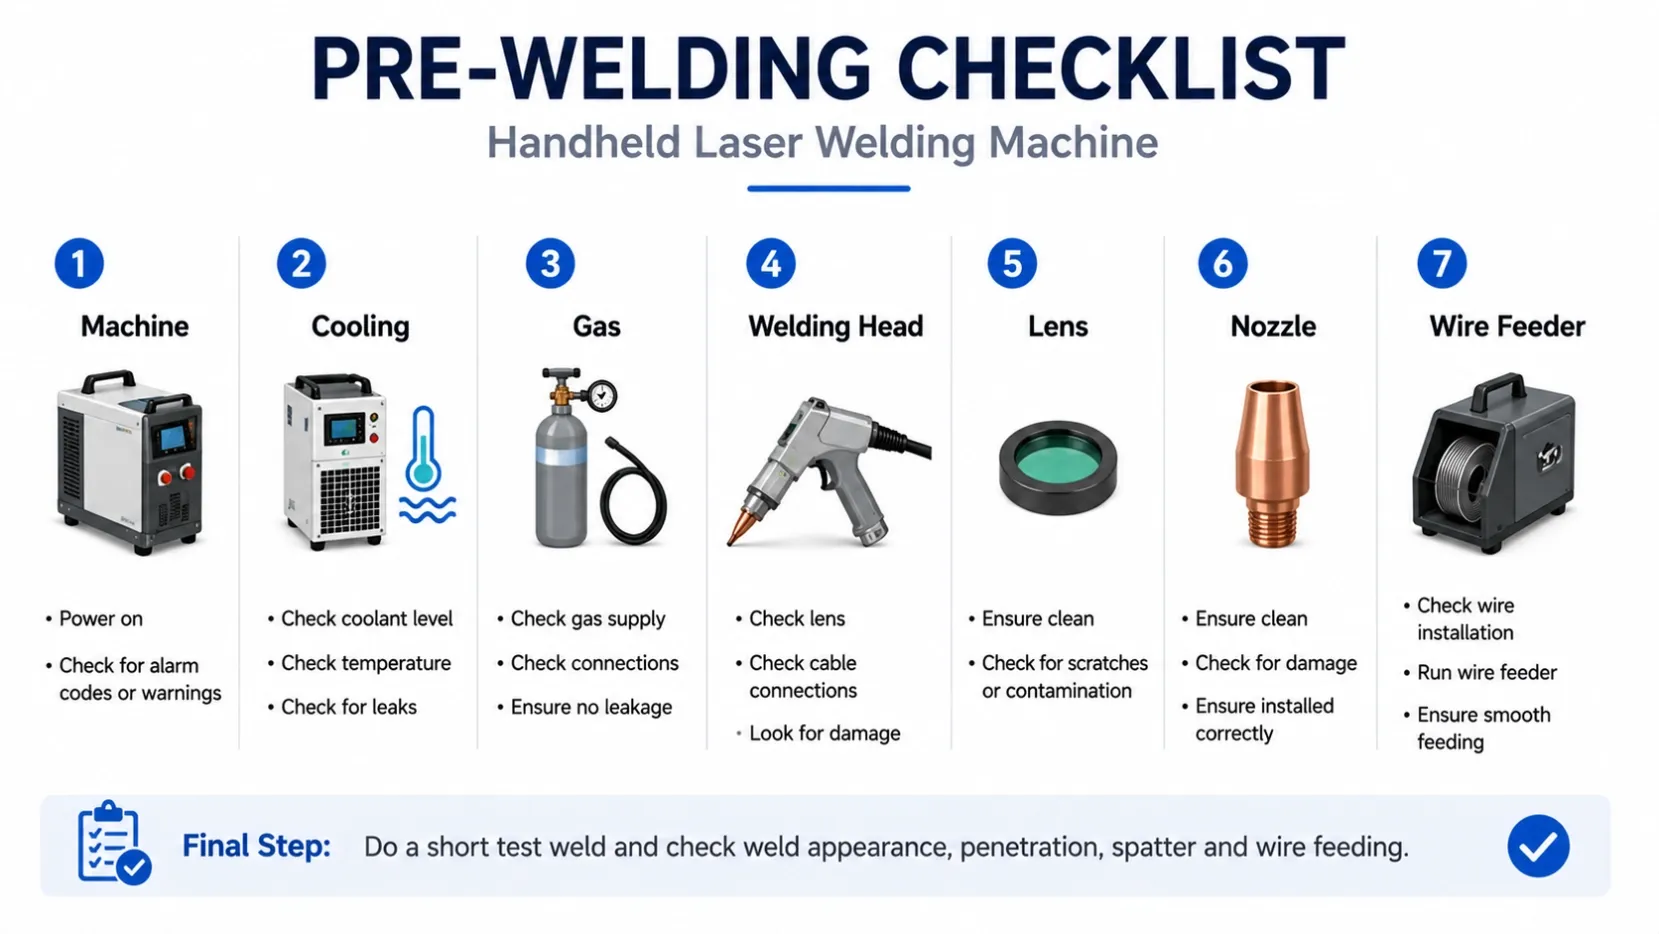
Check the laser source, cooling system, gas supply, Handheld Welding Head, nozzle, and wire feeder before welding. A short test weld can help confirm stable equipment performance.
A quick inspection before welding can prevent common problems such as unstable wire feeding, poor shielding, lens damage, and unexpected machine alarms.
Turn on the machine and check the display for alarm codes or abnormal warnings. Do not start welding if an error remains.
For a water-cooled system, confirm that the coolant level and temperature are within the machine's specified range. Check the hoses and fittings for leakage.
3. Check Shielding Gas
Check the gas supply and hose connections. Make sure there is no obvious leakage or blocked gas path.
Check the protective lens, nozzle, and cable connections. Look for lens discoloration, spatter buildup, loose connections, or physical damage.
Make sure the nozzle is clean, undamaged, and properly installed. A damaged or incorrectly installed nozzle can affect gas coverage and welding stability.
6. Test Wire Feeding
If filler wire is used, run the wire feeder briefly and check whether the wire moves smoothly and continuously. Watch for slipping, bending, or inconsistent feeding.
7. Do a Short Test Weld
Before production, weld a small test piece using the intended material. Check weld appearance, penetration, spatter, and wire feeding before starting continuous work.
Final Checklist
Laser Source ✓ Cooling ✓ Gas ✓ Handheld Welding Head ✓ Lens ✓ Nozzle ✓ Wire Feeder ✓ Test Weld ✓
A 3–5 minute inspection can help identify small problems before they become production interruptions.