Sep 7, 2026
How Does Surface Preparation Affect Handheld Laser Welding Quality?
Surface contamination can affect penetration, appearance, and stability. Learn how proper cleaning and joint preparation improve handheld laser welding quality and reduce defects.
Before starting a welding job, many operators focus on laser power, welding speed, and wobble settings. However, the condition of the metal surface can also have a direct impact on weld quality.
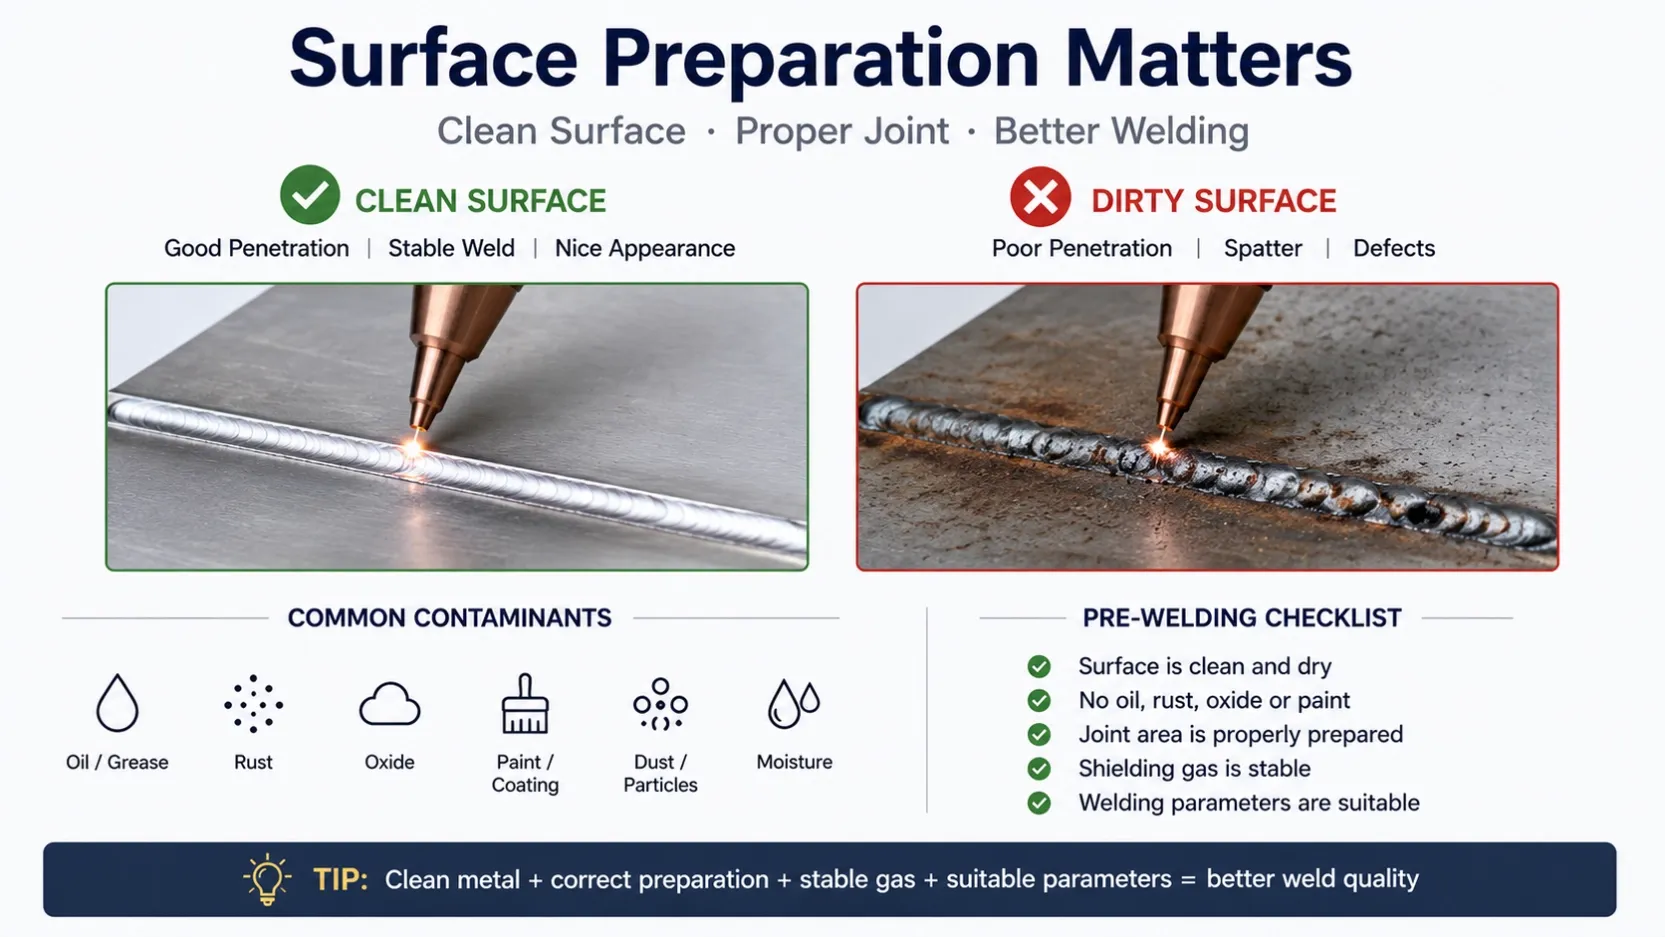
Oil, rust, oxide, paint, and other contaminants can enter the molten pool and contribute to porosity, unstable welding, or poor fusion.
1. Why Surface Cleaning Matters
A handheld laser welding machine creates a concentrated heat source, so surface contamination can quickly affect the welding process.
Common contaminants include:
- Oil and grease
- Rust
- Oxide layers
- Paint or coatings
- Dust and metal particles
- Moisture
When these contaminants are heated, they can release gases or interfere with melting and fusion. Oil contamination, for example, has been shown to affect melt-pool stability and can contribute to porosity and lack of fusion.
2. Match the Cleaning Method to the Contamination
Not every workpiece needs the same cleaning method.
Light oil or grease:
Use a suitable degreasing method and make sure the surface is completely dry before welding.
Rust and oxide:
Remove the contaminated layer mechanically or with laser cleaning when appropriate.
Paint or coating:
Remove the coating around the welding area before starting. Do not rely on the laser to burn through heavy coatings during welding.
Dust and metal particles:
Use a clean, dry cloth or appropriate air cleaning method before welding.
The goal is simple: the welding area should be clean, dry, and free from loose contamination.
3. Pay Attention to the Joint Area
Cleaning only the visible top surface is not always enough.
For lap joints, butt joints, and corner joints, contaminants can remain inside the contact area between the two workpieces. This can become especially important when oil or moisture is trapped between the surfaces.
Before welding, check:
- Both sides of the joint
- The actual fusion area
- Edges and corners
- Areas where oil or moisture may accumulate
Good surface preparation should be part of the welding process, not an optional step.
4. Surface Preparation Also Affects Appearance
A dirty surface can lead to more than internal defects. Oxidation and contamination may also cause:
- Dark or discolored welds
- Uneven weld beads
- Increased spatter
- Unstable penetration
- More post-weld cleaning
For stainless steel and aluminum, surface condition is particularly important because oxide layers can interfere with consistent welding results.
5. Don't Compensate for a Dirty Surface by Increasing Power
One common mistake is to increase laser power when the weld does not look good.
This does not necessarily solve the problem.
If the real issue is oil, rust, oxide, or moisture, increasing power may simply increase heat input while the contamination remains.
A better troubleshooting sequence is:
Clean the surface → check the joint fit-up → check shielding gas → then adjust welding parameters.
This makes it easier to identify the actual cause of the problem.
6. A Simple Pre-Welding Checklist
Before using a handheld laser welding machine, quickly check:
✓ Surface is clean
✓ No visible oil or grease
✓ No loose rust or oxide
✓ No moisture
✓ Joint area is properly prepared
✓ Shielding gas is stable
✓ Welding parameters are suitable for the material
This simple preparation can reduce unnecessary parameter adjustments and improve welding consistency.
Good laser welding does not start when the laser is turned on. It starts with proper surface preparation.
For handheld laser welding, clean metal + correct joint preparation + stable shielding gas + suitable parameters provides a much more reliable starting point for achieving consistent weld quality.